Enabling Online Booking
Online booking is the digital front door to your practice. When configured correctly, it empowers patients to schedule at their convenience while ensuring your clinical resources are protected, your data is secure, and your team spends less time on the phone.
Why Online Booking Matters
Patient Access and Experience
Healthcare needs arise outside of standard business hours. Online booking bridges the gap between patient need and provider availability.
- 24/7 Availability: Patients can schedule, reschedule, or cancel without waiting on hold.
- Reduced Barrier to Care: Eliminates phone anxiety and long wait times — documented reasons why patients delay seeking care.
- Instant Confirmation: Automated digital confirmations and calendar integration provide immediate peace of mind.
Operational Efficiency
Automating the intake process lets your team focus on high-touch patient care rather than manual scheduling.
- Reduced No-Shows: Integrated automated reminders via SMS and email significantly decrease missed appointments.
- Workload Distribution: Fewer administrative phone calls allow front-desk staff to focus on patients physically present in the clinic.
- Real-Time Optimization: Live availability is reflected to the public, filling last-minute cancellations automatically.
Data Integrity and HIPAA Compliance
Digital booking ensures patient information is captured accurately and stored securely from the first point of contact.
- Standardized Intake: All necessary preliminary data — insurance, reason for visit — is collected uniformly.
- Secure Data Handling: Digital inputs are encrypted and integrated directly into WithinEHR in compliance with HIPAA standards.
How to Enable Online Booking
- Select Settings on the navigation pane.
- Select Patient Portal Permissions.
- Enable the Patient Portal to reveal booking options.
- Turn on Appointment Request to activate appointment availability requests.
- Choose your preferred time windows from the list.
- Click Save.
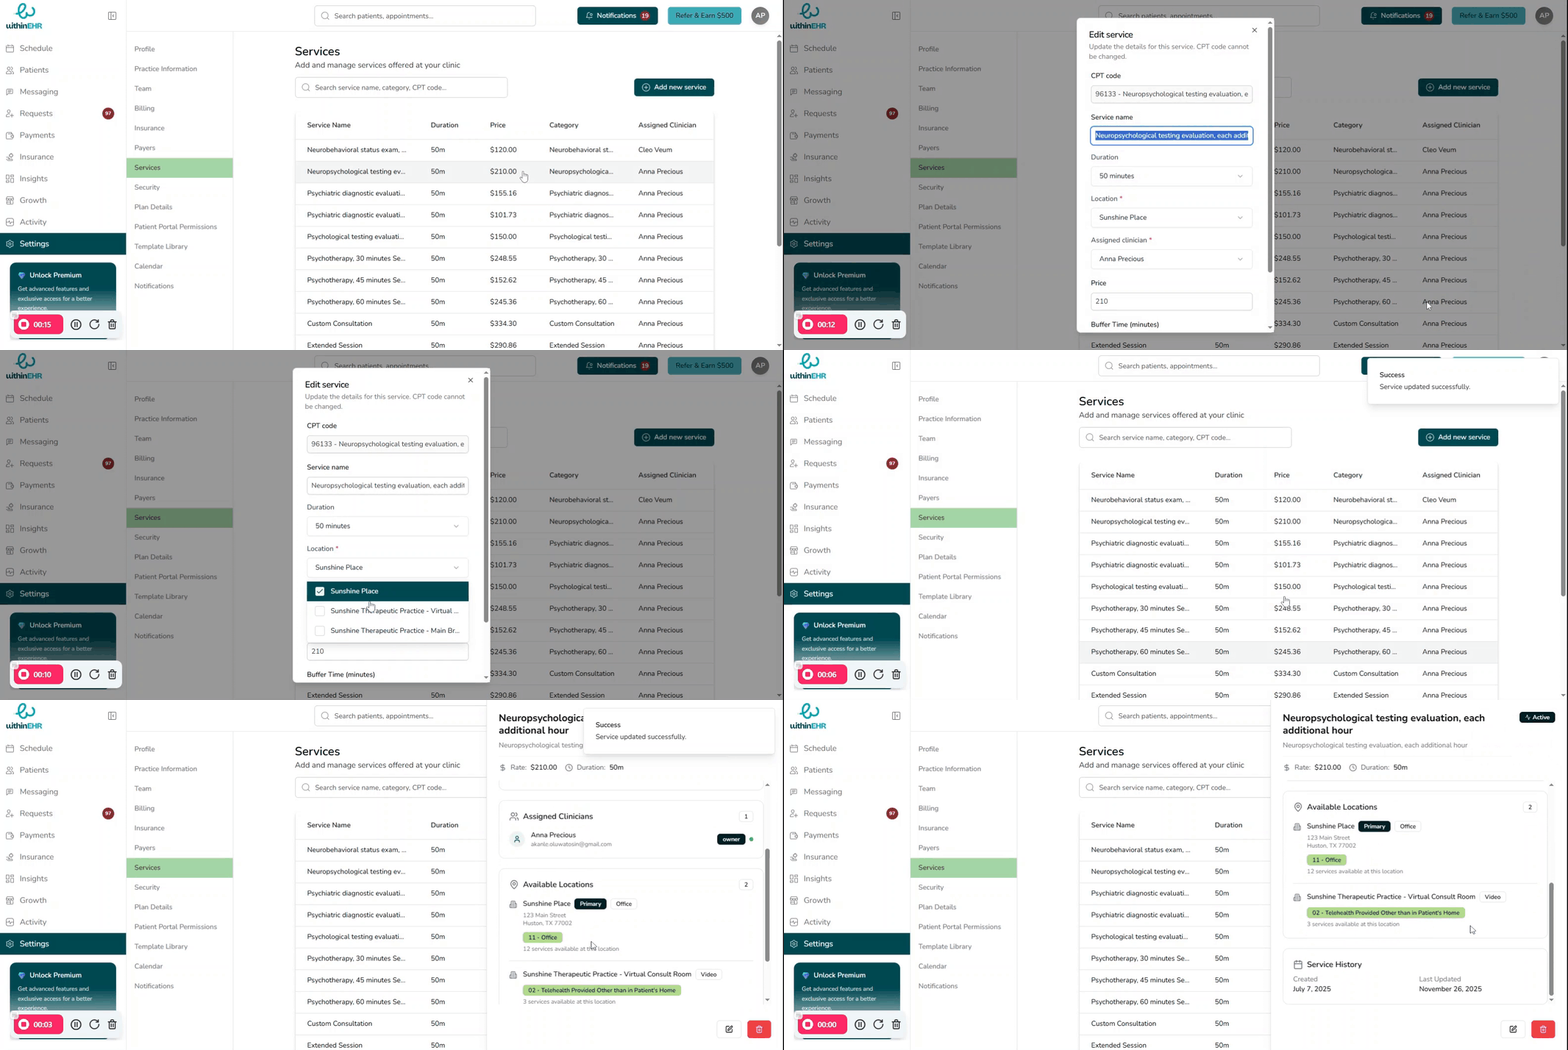
Designate Which Services Can Be Booked Online
Control exactly which appointment types are available for client self-scheduling. This prevents clients from booking complex or first-time services without proper clinical vetting.
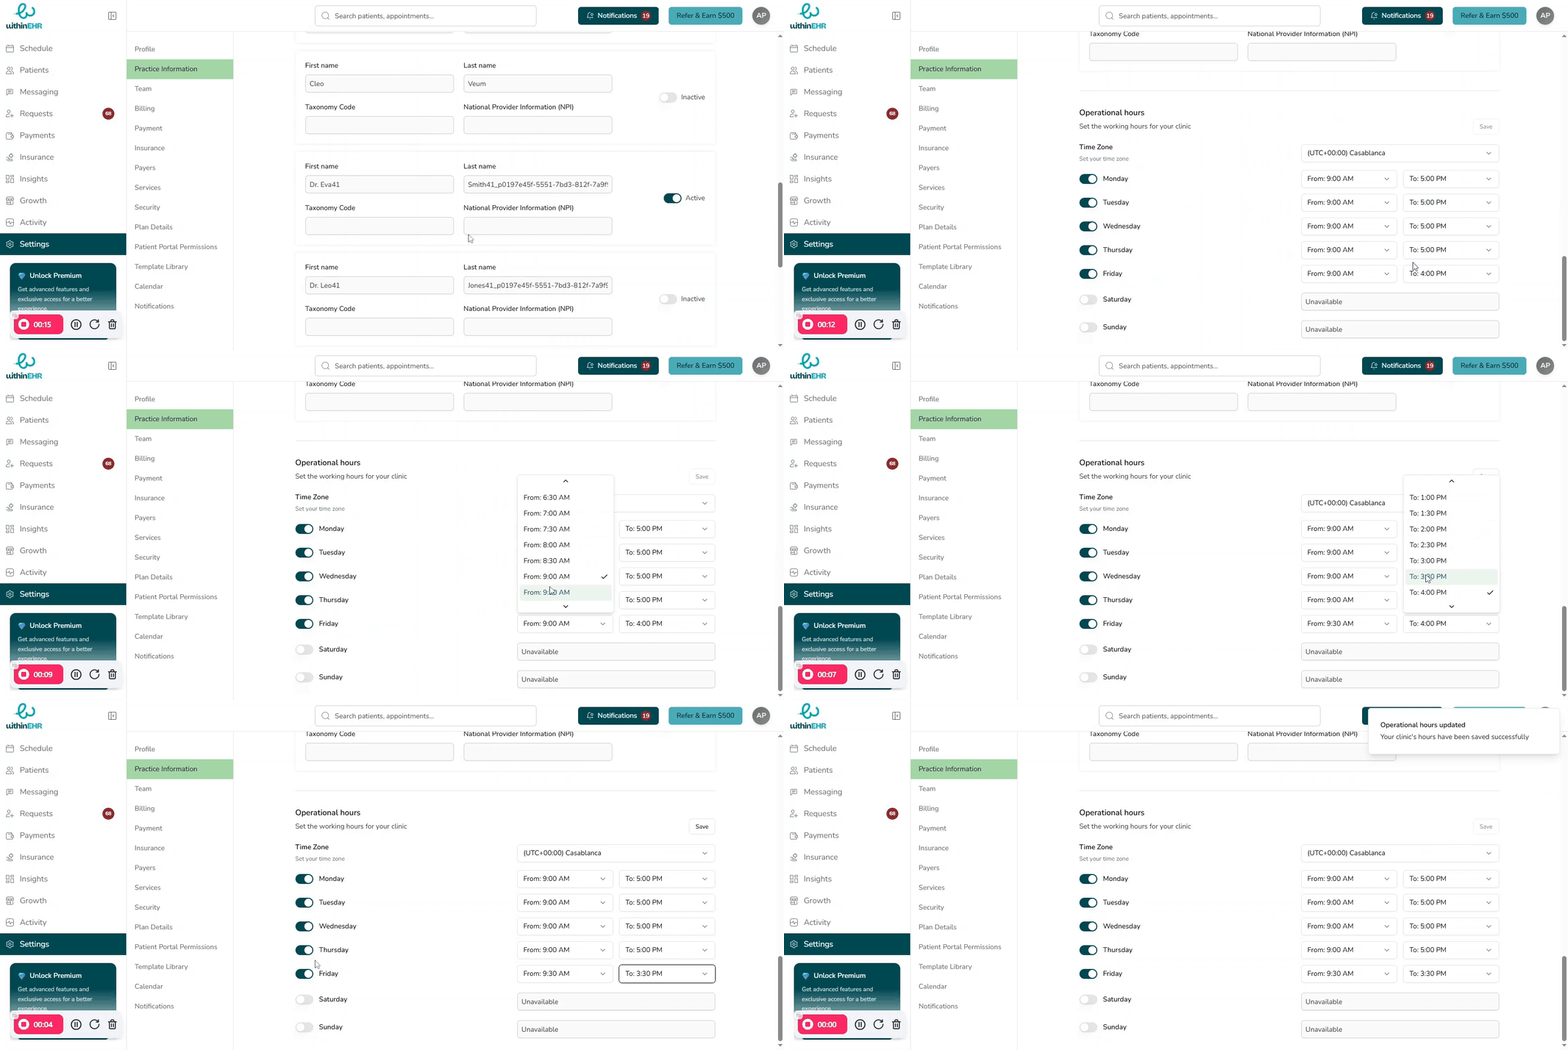
Set Practice Operational Hours
Operational hours define the windows when clients can request or be scheduled for appointments. Setting this correctly keeps your calendar accurate across all providers and locations.
- Go to Settings.
- Select Practice Information.
- Open the Operational Hours section.
- Toggle specific days on or off.
- Set a Start time and End time for each active day.
- Click Save.
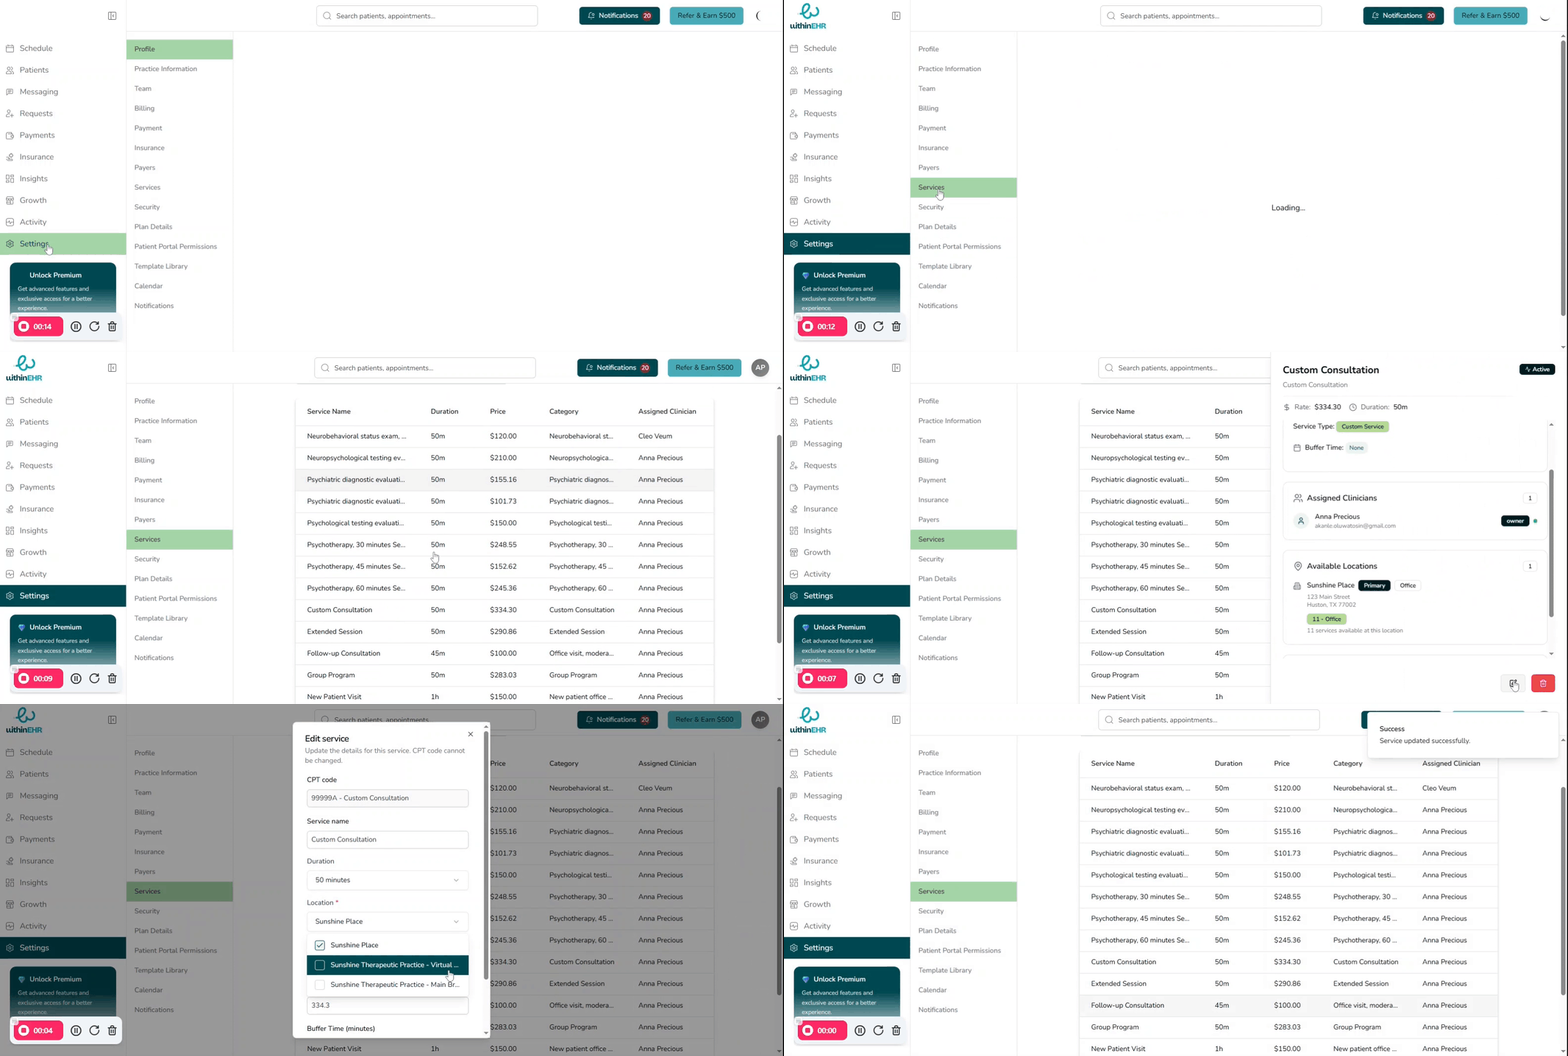
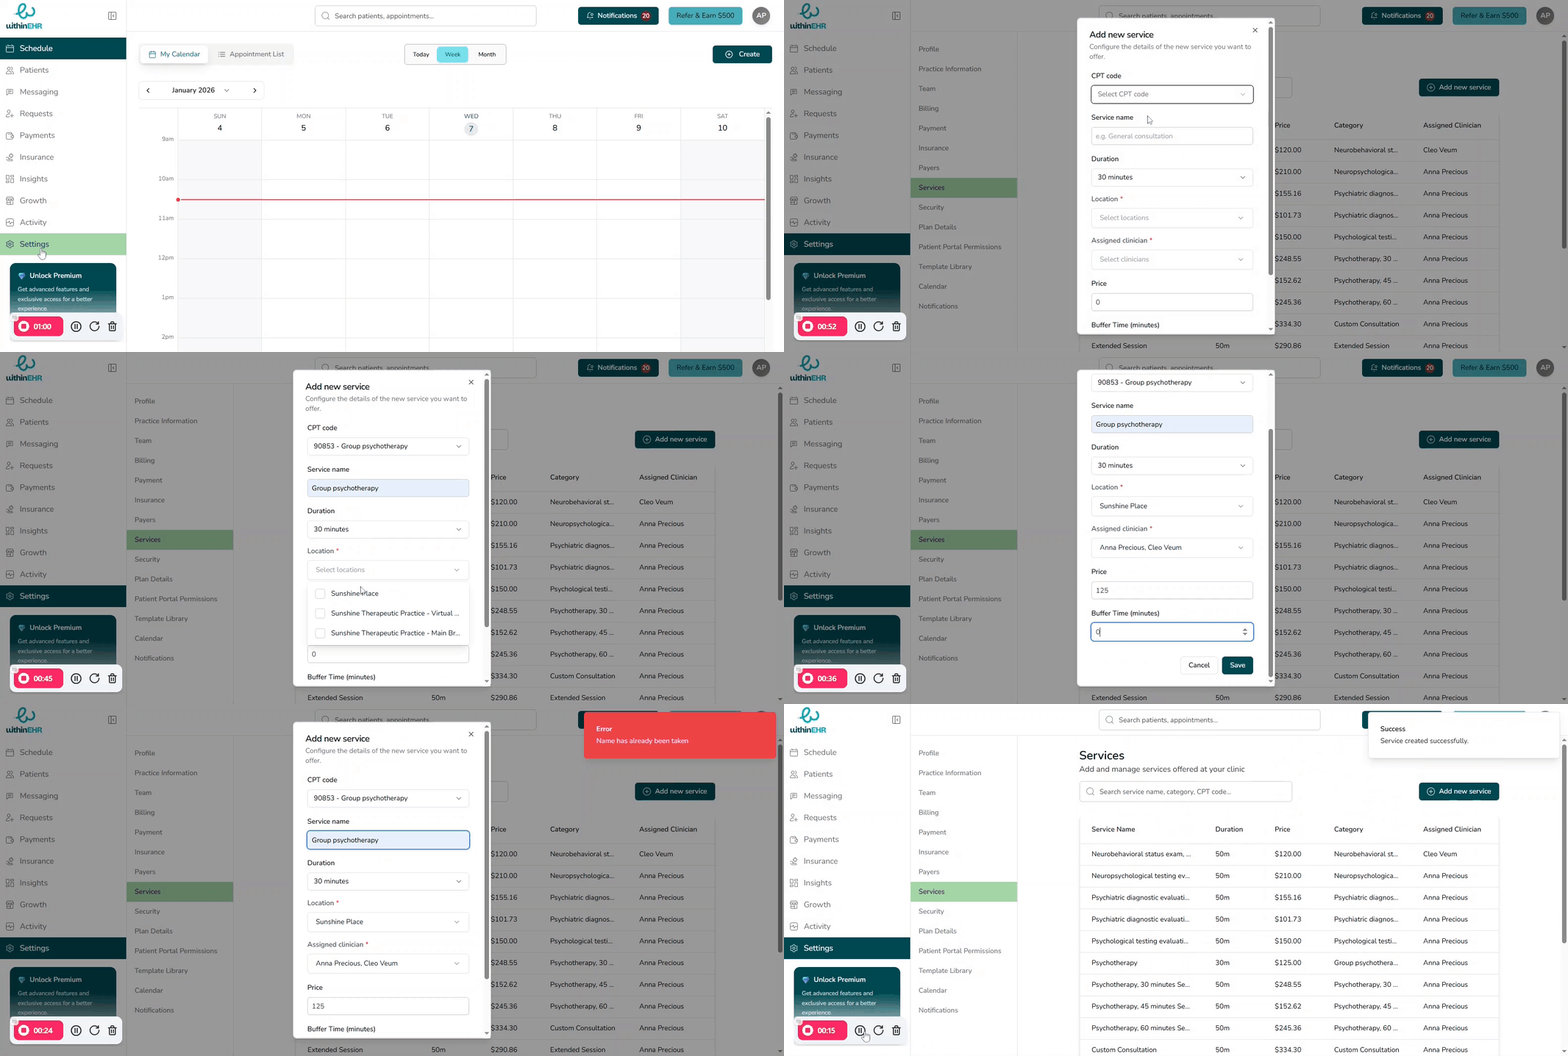
Schedule Time Between Appointments
Buffer time between appointments is a clinical and operational necessity — not a luxury. It allows for point-of-care documentation, room turnover, and provider recovery between complex cases.
- Select Settings on the navigation pane.
- Choose Services.
- Click Add New Services or edit an existing service.
- Set the buffer time in the appropriate field.
- Click Save.
Set Booking and Cancellation Policies
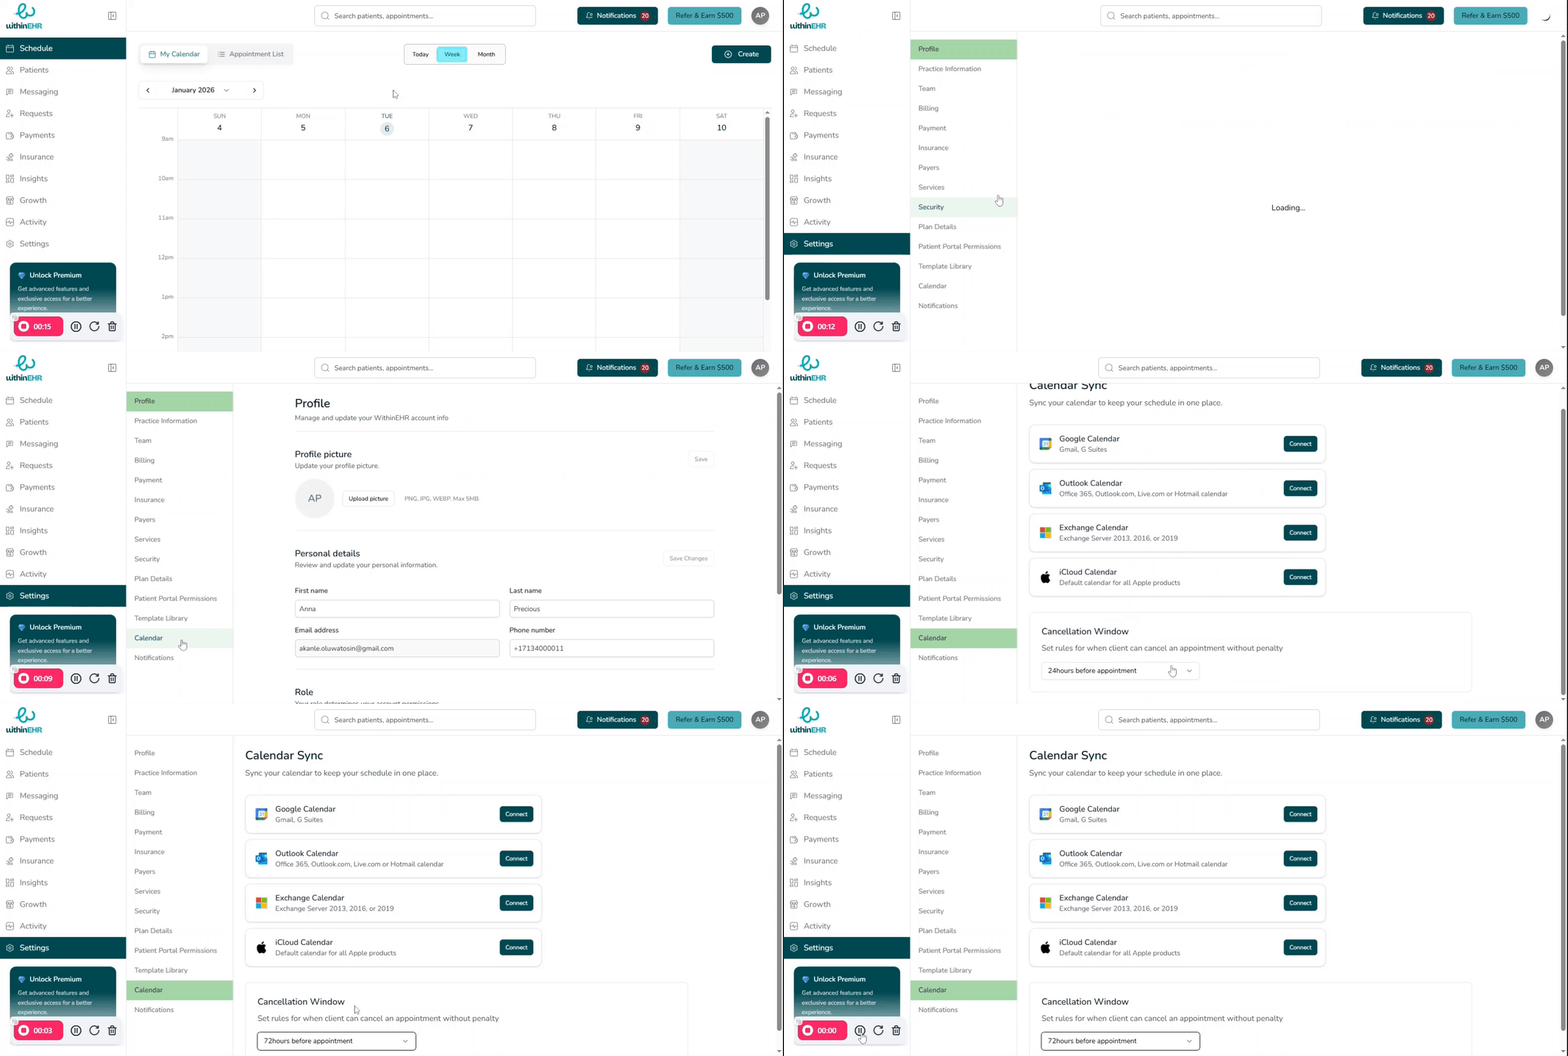
A clear cancellation policy protects patient care continuity, optimizes provider time, and maintains financial stability.
- Click Settings on the navigation pane.
- Select Calendar.
- Scroll down to Cancellation Window.
- Choose the number of hours before an appointment that cancellations are allowed.
Set Booking Policies
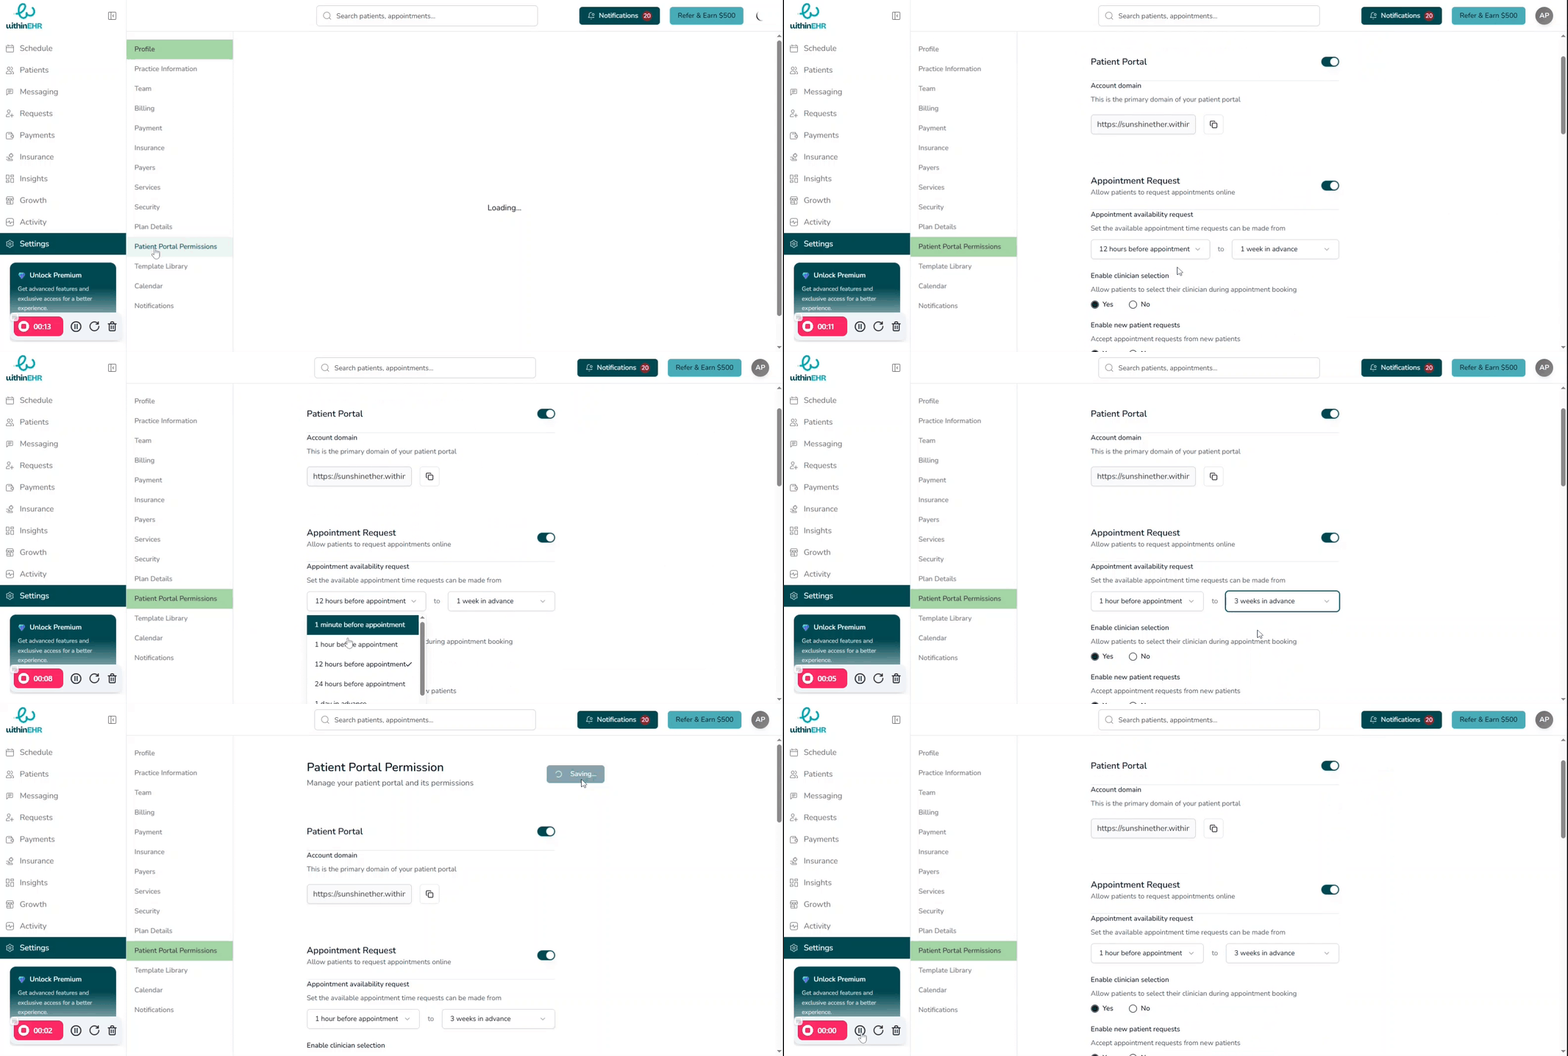
- Select Settings on the navigation pane.
- Select Patient Portal Permissions.
- Set the available appointment time request windows.
- Select the number of weeks in advance clients can book.
- Click Save.
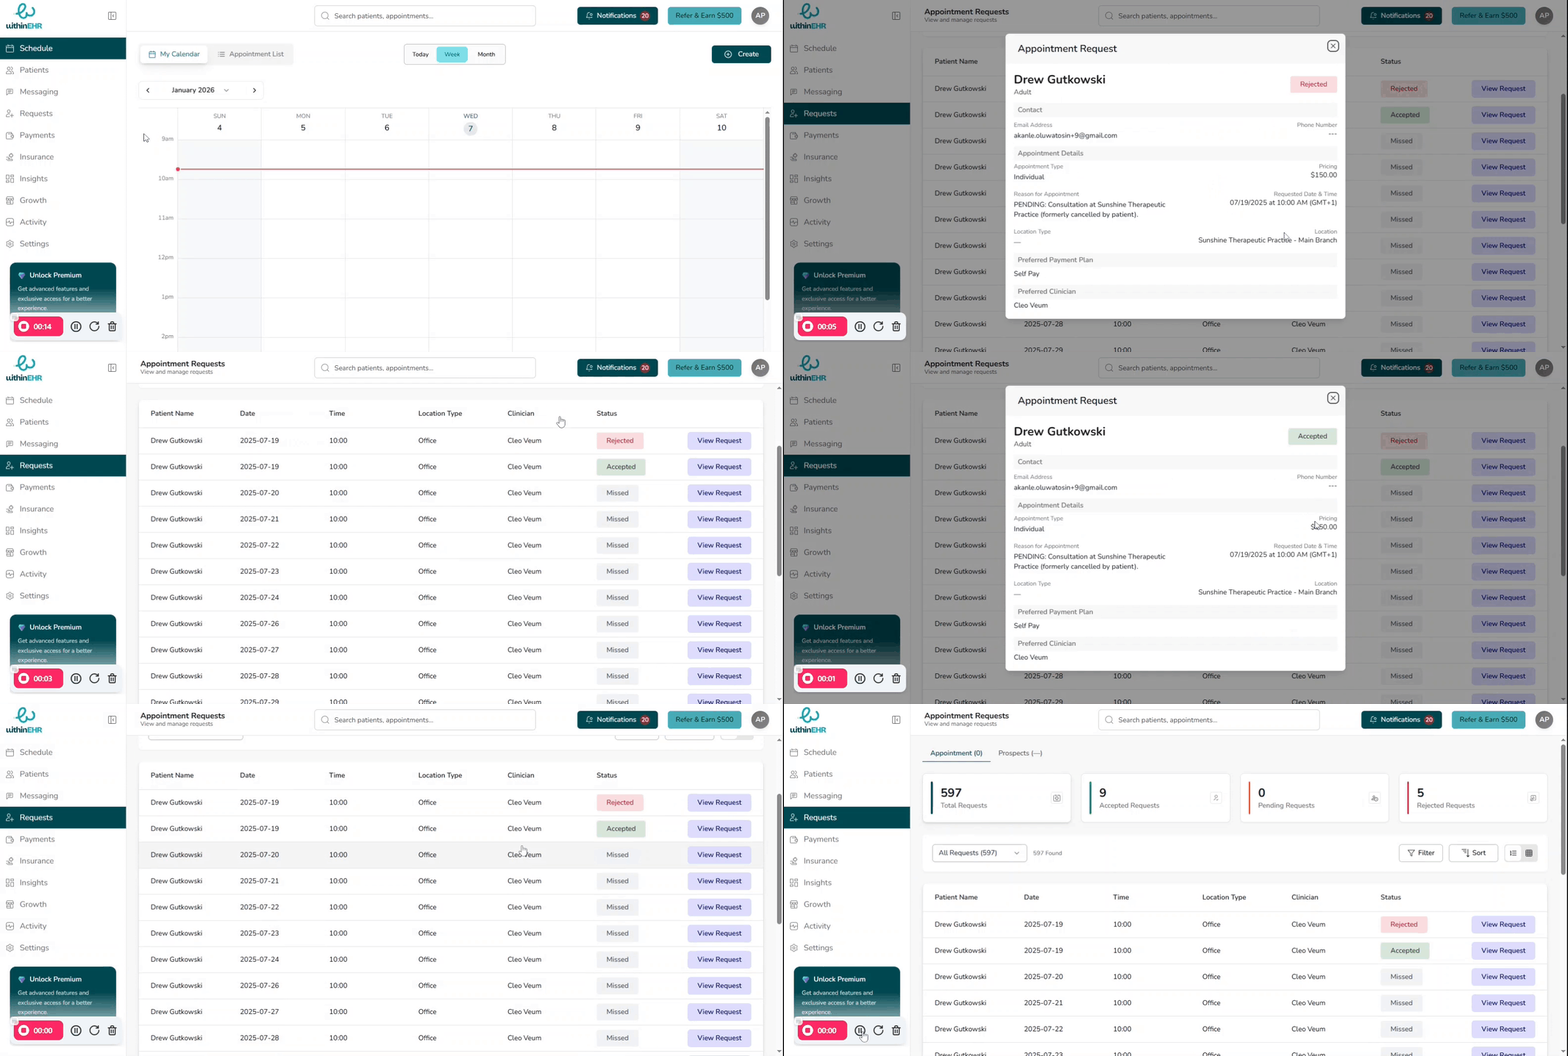
Handle Appointment Requests
When clients submit appointment requests through the portal, review and confirm them from the Requests tab.
- Select Requests on the navigation pane.
- Choose from the list of pending appointment requests.