Managing Your Availability
Availability controls when clients can book with a clinician. Configuring it correctly keeps your calendar accurate, protects personal time, and ensures online booking requests only appear in valid windows.
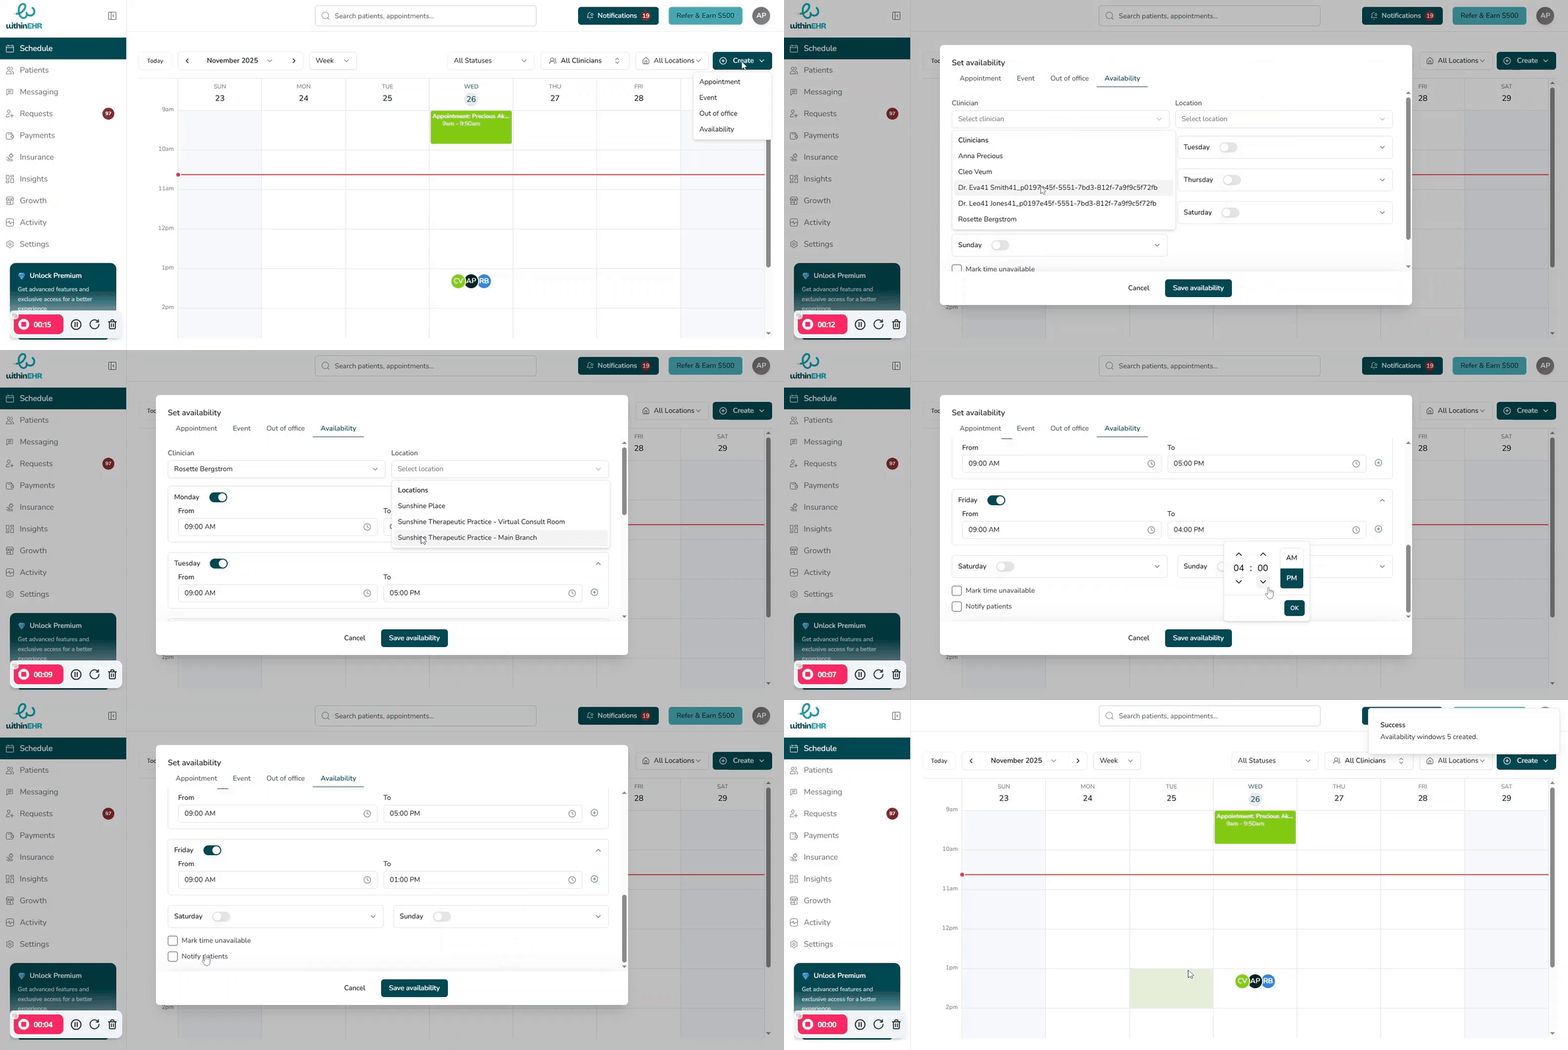
How to Set Your Availability
- Select Schedule on the navigation pane.
- Click Create at the top right of your screen.
- Select the Availability tab.
- Fill in the required fields — clinician, location, days, start time, and end time.
- Click Save Availability.
Steps to Update a Clinician's Availability
- Go to the Schedule or Calendar tab.
- Click Create and select Availability.
- Confirm you are editing the correct clinician's calendar.
- Choose the Location where this clinician will be available.
- Set the weekly working hours — days, start time, end time, and recurrence.
- Click Save Availability.
Default Availability Behavior
If a clinician has not created personal availability blocks, the practice's operational hours serve as their default booking window. Once a clinician adds their own availability, those clinician-specific rules take priority and give you more precise control over when they can be scheduled.
Tips
- Create separate availability blocks for different locations or services (e.g., mornings in-office, afternoons telehealth) to make scheduling more efficient.
- Use out-of-office events for vacations and one-off changes rather than editing your base availability each time your schedule shifts.